
How to Digitize Any Font for Embroidery
Stitch names, monograms and custom text in a font you already own. Boldbobbin 1.2 turns any typeface into real lettering you can tune letter by letter.

Alexandre Binninger
Founder of Boldbobbin, Ph.D. in Computer Graphics from ETH Zurich
11 min read
Lettering is a major cornerstone of embroidery design, and up until now, it was crucially lacking in Boldbobbin. In one of the biggest releases we have made to the program, version 1.2 brought a full-fledged lettering editor. You are now fully able to digitize entire fonts and reuse them across several designs for personalization. But that’s not all: you can bring in any typeface and auto-digitize it to get a nice satin stitch pattern that will follow the flow of the letter. To ensure your work is safe, we also provide cloud-based font saving, which means that if you digitize fonts once, they will be available on all your connected devices right away.
In this article, we detail this release and how you can use the program to create your own fonts.
Import your own typeface
Creating a font from scratch is hard. Not only do you need to create the geometry of every letter, but you also need to adjust the spaces between the pairs of letters (an art often referred to as kerning). However, this work has already been done for many fonts and is embedded in formats such as .ttf (TrueType Font) or .otf (OpenType Font). Rather than starting from scratch, you can directly import these fonts into the software.
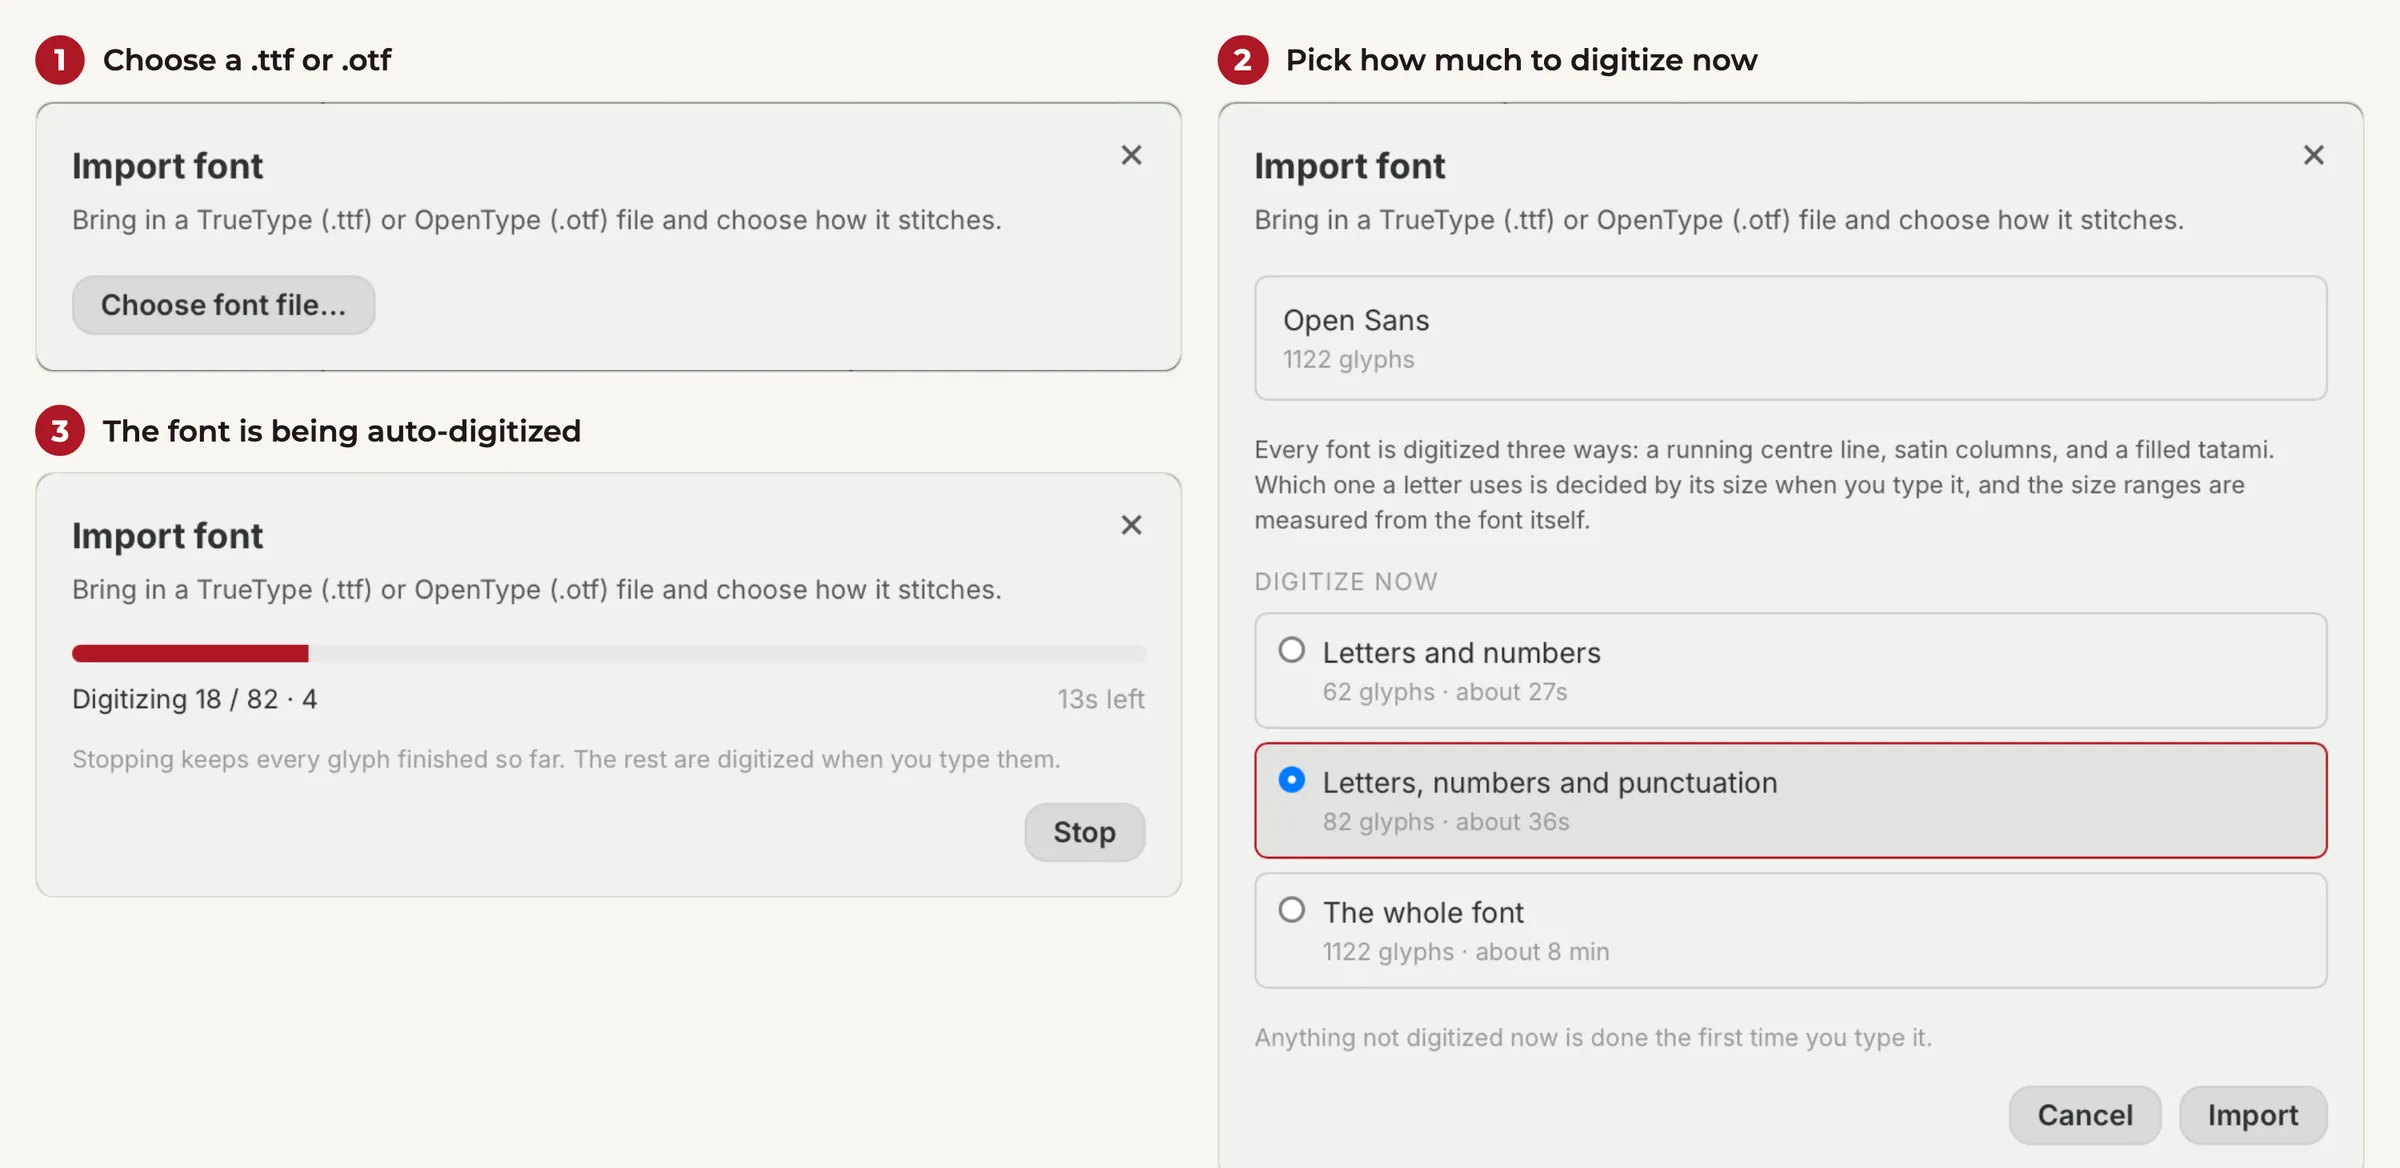
To do so, simply click on the icon on the toolbar. You will then be prompted to import your own font. If you do not have a font, you can find some to try out on websites like Google Fonts, for instance this one. Always check the licence, especially if you plan on using the resulting embroidery in a commercial setting.
Lettering auto-digitizing
Because fonts are notoriously difficult to handle, they are also very difficult to auto-digitize. A simple strategy is to apply tatami filling to the font you import. Doing so works, but gives a flat look and does not really make the font “pop”. Serif fonts at small sizes suffer the most from this.
The best effect is achieved by creating a satin stitch that follows the flow of the font. The difficulty is that finding the medial axis the satin stitch should follow is a hard problem in computer graphics. It requires complex algorithms that compute a medial skeleton, analyse the curvature features of the letter, solve the junction problems, segment it into meaningful parts, and then create satin rungs accordingly.
Difficult does not mean it shouldn’t be done! I implemented this, and you can see in the video below how it works in more detail.
Creating a first satisfying version of a font auto-digitization system was difficult but particularly useful as it also sets up the foundation for more advanced auto-digitization techniques for general designs in the future!
Our new font editor
Auto-digitizing is a nice way to create fonts quickly, but it doesn’t always produce satisfying results. This is why we created a full-fledged lettering editor.
When you click on the lettering icon , you then open a panel that lets you edit a font. In case you did not import any font, you can actually copy one of our embedded fonts and create your own version of it in the system. You will then open the lettering editor.
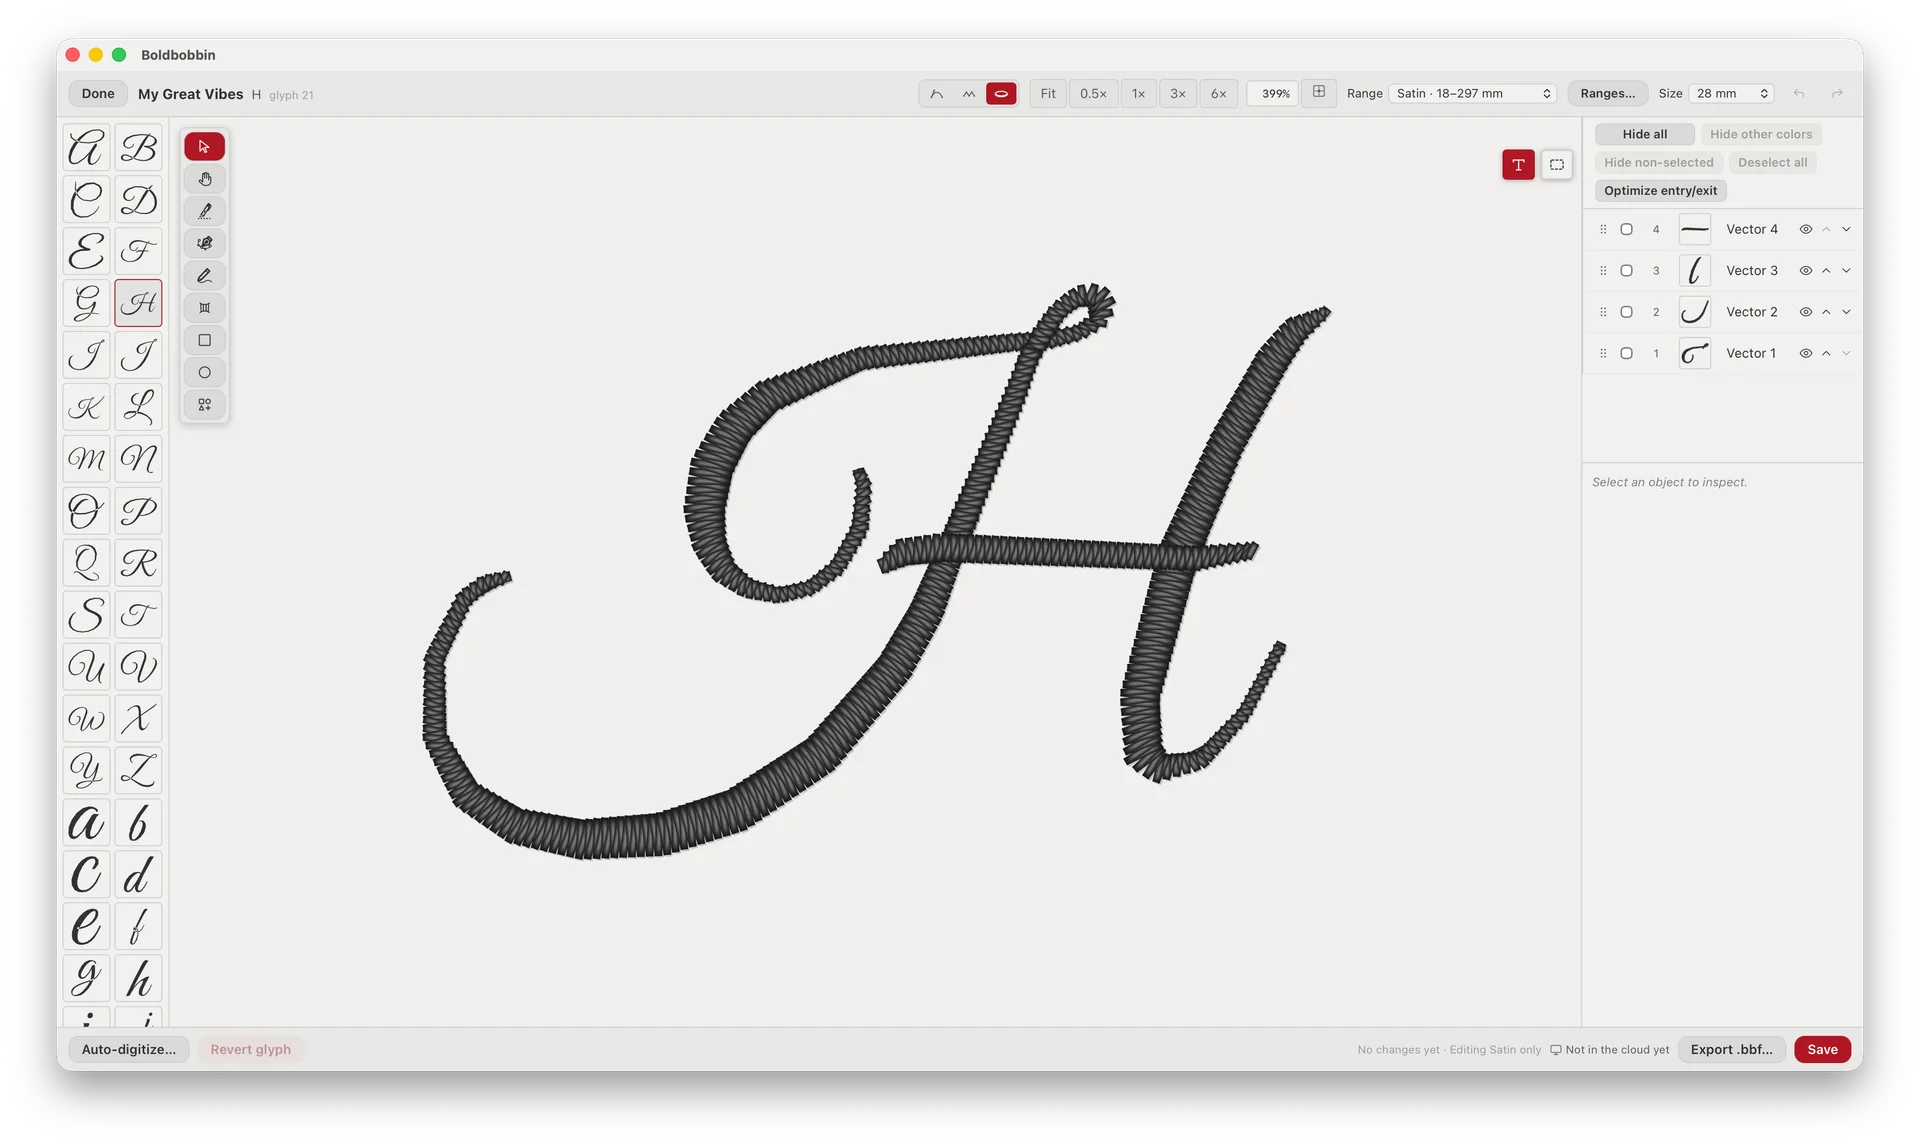
This should mostly look familiar! On the left, you can select the specific letter or character you want to work on. You have all the digitization tools available, such as the pen tool, the freehand tool, the satin column, and so on. You can see all the different layers and properties, and switch between the three main rendering modes. I recommend using the stitch mode and creating the geometry on top of the glyph that will appear just behind. This is surprisingly easy, though it does take some time to complete a whole alphabet. Hopefully the auto-digitizing will have nailed most of the letters already!
Ranges
Lettering is often best proposed in different size ranges. However, not every digitization fits the same range. Sometimes, it is better to simply have a running stitch that goes down the centerline, or to use tatami filling. Our software does let you propose recommendations over the size range of a specific digitization.
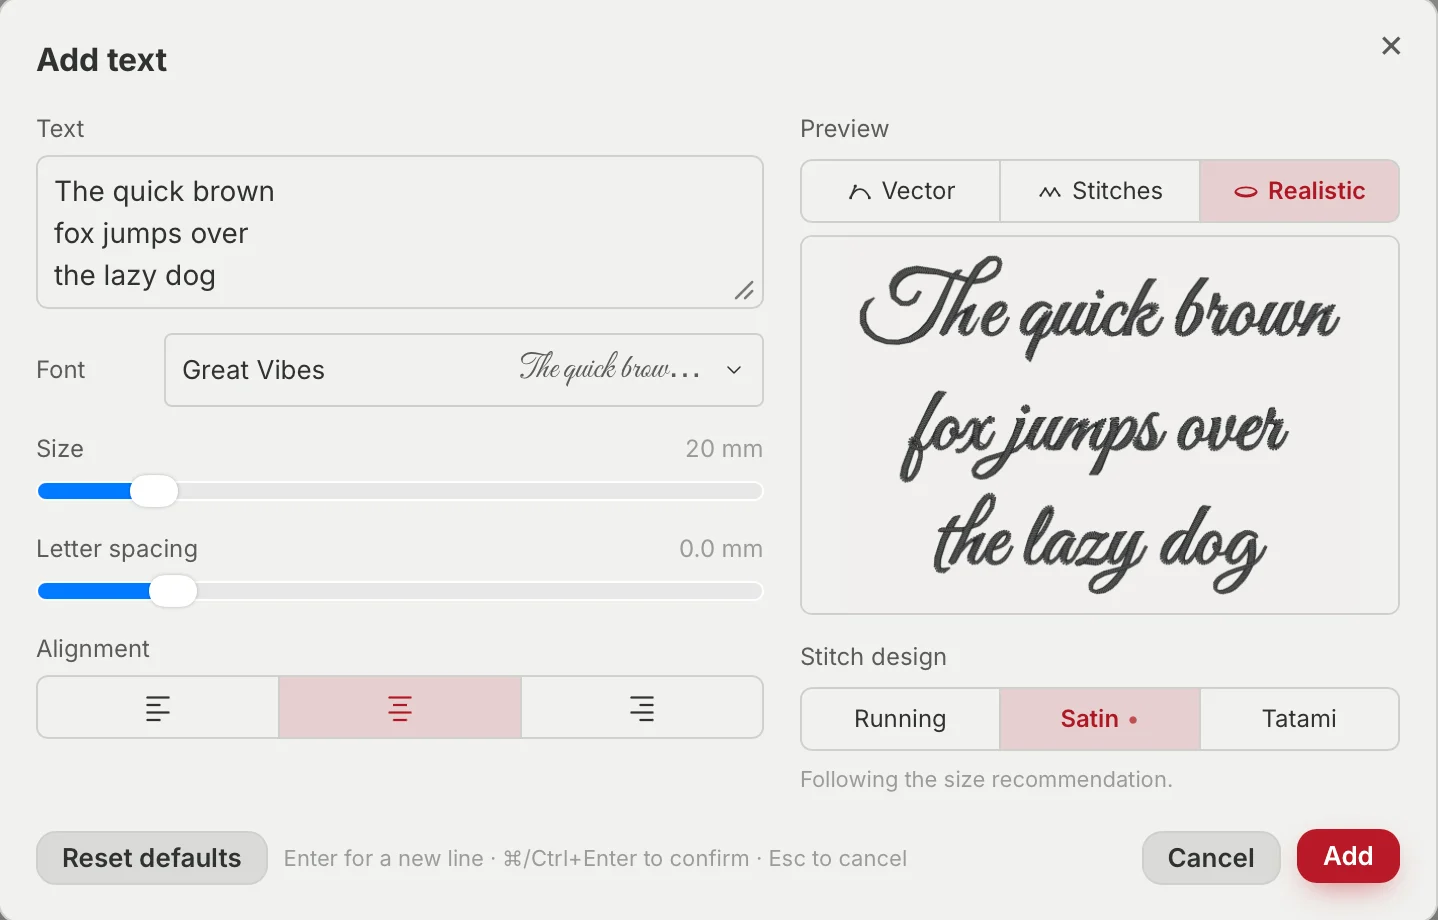
These ranges appear in the text tool as recommendations for the size you are aiming to embroider at. Doing this, you are sure to have the best stitching experience at every size you want to embroider. In general, we recommend having at least two or three ranges:
 | 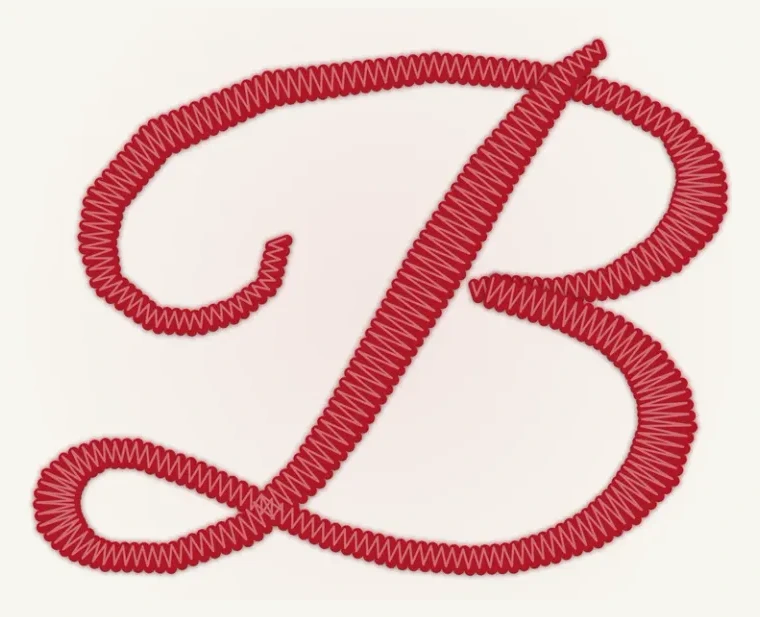 | 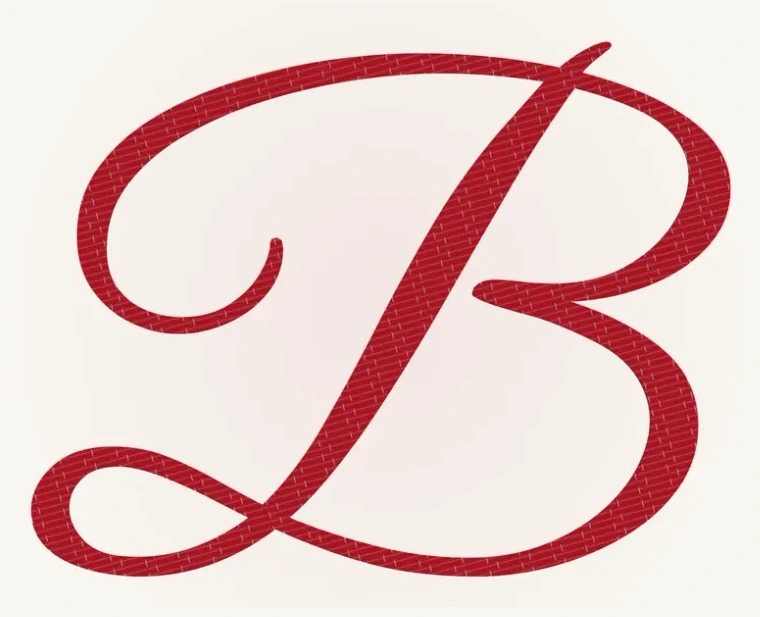 |
|---|---|---|
| Running | Satin | Tatami |
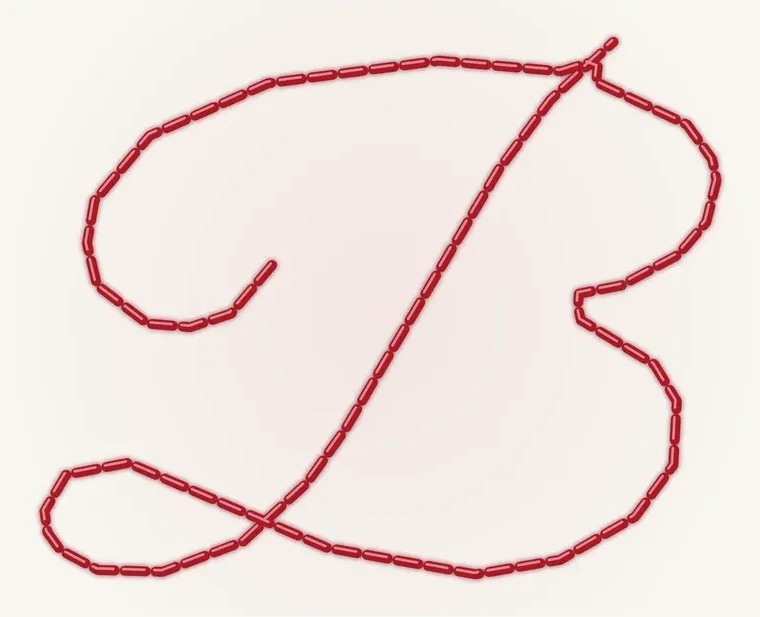
- Running, a single line down the middle of each stroke, for small text. This one is optional if the font is bulky by default, but is useful to propose for thin, serif fonts.
- Satin, stitches laid across each stroke. This is what most embroidered lettering looks like, and in my opinion, what looks best in general.
- Tatami, the letter filled row by row, for text too large to satin or if you deliberately want a flat effect.
Saving and exporting fonts
You imported a new font and manually corrected it. But what if you want to use it on another device? And if you lose your computer, does all your work vanish?
Fear not, we have implemented the solution! Every font comes with a specifically designed file format called .bbf. This file format embeds not only the font, but also all the digitizing that you have done with it. In the lettering editor, you can simply click on the Export .bbf button at the bottom right of the panel.
Every font you make can be saved in our cloud. You never risk losing your work.
To ensure that you can swiftly change devices between sessions, we also offer cloud saving for your fonts. This means that there is no risk of you losing all your fonts, as they are directly secured on our servers and linked to your account.
Six fonts bundled in the software for now
The revision of our lettering abilities was the perfect occasion to review the default fonts already in the software. In total, six families are already digitized and ready to type with: Lato, Montserrat, Oswald, Anton, Lora and Great Vibes.
Hover a letter to see the outline the stitches follow.
Rather than relying only on the auto-digitization, we digitized all the major characters by hand when necessary (namely A-z and 0-9). We also set up their entry and exit points deliberately so the strokes join in the order a person would sew them.
If you have a specific font you would like us to add to the software, don’t hesitate to contact us! We might very well be able to ship it in the next version of the software.
A Pro feature
While everyone is able to use the fonts we have shipped with our software, lettering remains mainly a Pro feature. Of course, Boldbobbin strives to make every feature as transparent as possible, and lettering is no exception. You can use the lettering editor and the auto-digitizing, but exporting your digitized font as a .bbf, or any design that uses it, is gated behind a Pro subscription.
| Fonts and lettering | Free | Pro |
|---|---|---|
| Import a font + auto-digitize it | Included | Included |
| Edit any letter’s stitches | Included | Included |
| Set text in your own font and preview it | Included | Included |
| Export a design that uses your own font | Not included | Included |
Export the font itself as a .bbf | Not included | Included |
| Keep your fonts in the cloud | Not included | Included |
The table above summarizes what is gated and what is free. Full details are on the pricing page.
Conclusion
While Boldbobbin made a strong improvement in its lettering abilities, there are still many things we want to improve! The auto-digitization is not perfect, but it helps tremendously as a first step for manual lettering. We do not yet support non-Latin alphabets, and that is definitely on our roadmap for future releases.
We hope you will find joy in creating your own fonts with Boldbobbin!