
Part 6 of 630 min
Tidy the path and stitch it out
The design is traced, but you need to reorder the shapes and organize the jumps and trims for an optimal stitch-out. Then, you will embroider your own design!
Sorry, I lied to you. But it was for the sake of learning! Let me explain.
Digitizers do not start a design by tracing its shapes. The first thing they need to consider is in which order they will trace those shapes and how they will connect the different parts. This ensures a smooth stitching process.
Why is this important? After all, machines can trim and make jumps. Well, trims are to be avoided as much as possible because they tend to be the moments where you get issues. When you trim, you generally need to add a tie-out stitch pattern, and you do add a bit of bobbin thread under your design, which increases the amount of thread at every trim. It can also fail: a trim is where an embroidery machine most often gets stuck on a thread break. To top it all off, it slows the process down substantially. Your machine might be stitching at 800 stitches per minute, but if you add 10 trims that take 30 seconds each, you add 5 minutes to your design. For personal use, this is not necessarily an issue. For embroidery in bulk, this can amount to hours of lost time.
Because our shape is relatively simple, we can optimize it after finishing the tracing. I presented this tutorial this way so that you understand the effect of efficient pathing on a finished shape, but remember to take pathing and layer order into consideration before you trace a single shape.
Look at the stitches to see the path
Switch to Stitch mode, with the button in the top right of the canvas or Shift + S.
A row of small buttons appears underneath it. Two of them matter here: a frog and a pair of scissors . They are the Jumps overlay and the Trims overlay. They are only visible in the stitch rendering mode. Turn both on.
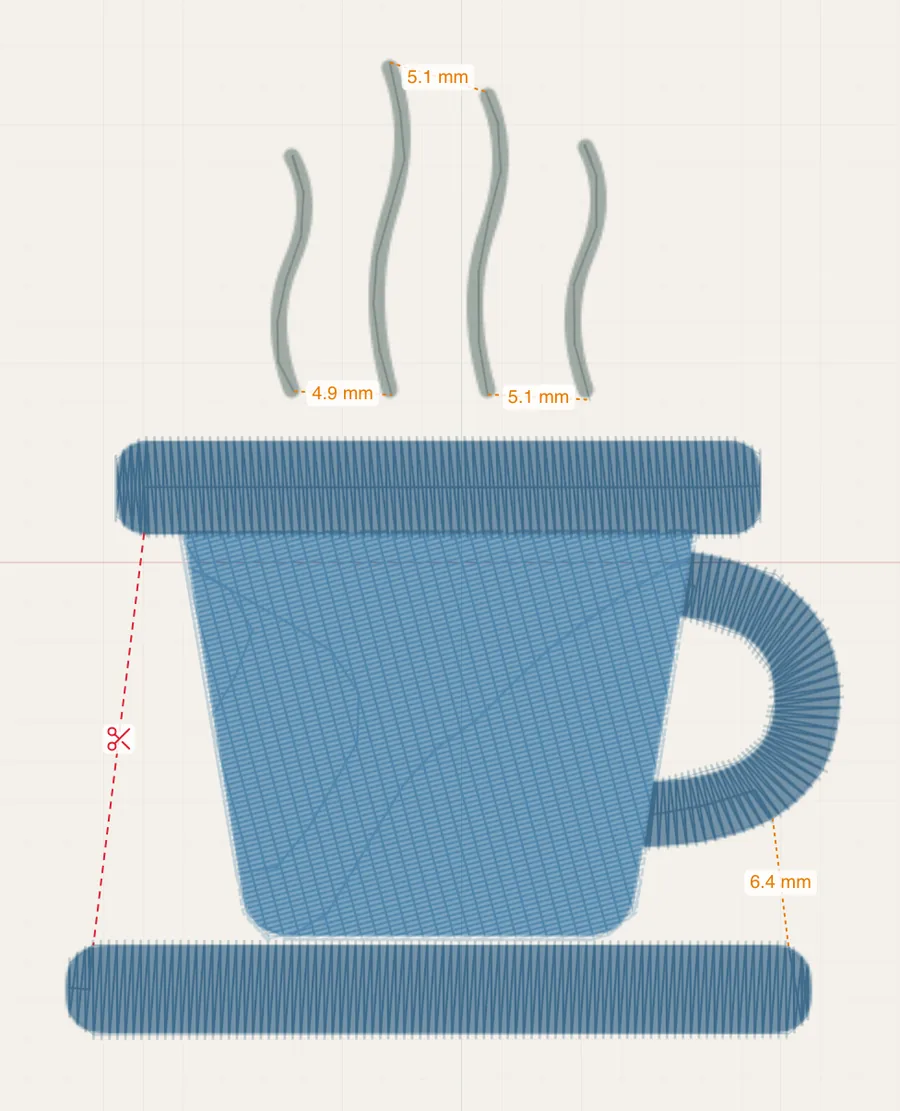
Now some lines appear between your shapes. Each one represents how the needle gets from one shape to the next. It follows this colour code:
- An orange dashed line with a distance on it is a jump. The needle travels with the thread still attached, leaving a loose strand across the design. You can leave them, or cut them off by hand afterwards.
- A red dashed line with scissors is a trim. The machine cuts the thread, moves, and starts again. No strand to clean up, but it costs time and it is where thread breaks happen.
- A plain solid line in the thread colour is a connection. The two shapes are sewn as one continuous run, with ordinary running stitches carrying the needle across.
Boldbobbin decides automatically which is which by distance: under 3 mm it connects, under 10 mm it jumps, beyond that it trims. Those are the defaults and you can change them, but the best practice is usually to change the design so it has fewer jumps and trims.
Changing the stitch order
If you look at the Layers panel and read it, you should see this:
| # | Shape |
|---|---|
| 4 | the handle |
| 3 | the saucer |
| 2 | the rim |
| 1 | the body |
You need to read it from the bottom up. The order is reversed because the 4th layer is actually the top layer when you look at the design. But the order in which you will stitch it starts with the bottom. The reference image sits below all of it with a ref tag and no number, since it is never sewn.
You should notice that the order does not make sense: we start with the rim, go all the way to the bottom to make the saucer, and then come back up the side to create the handle. The needle crosses the whole design twice, which isn’t very efficient.
To fix this, you need to swap the saucer and the handle. In the Layers panel, drag one row past the other, or use the chevrons on the row to Send forward and Send backward.
Press Show me how to modify the stitch order to see how to move the handle with the chevron. You will see the two long trims replaced by two jump stitches. Nothing else about the artwork changed, just the order in which each piece is embroidered. This is better, but not good enough!
Entry and exit points
When you were selecting shapes in the Stitch view, you might have noticed two small diamonds appear. They are the entry and exit points. There is a green one where the stitching starts and a red one where it ends. The software will compute how to stitch the shape under the constraint that the stitching starts and ends at these specific points. They are also the points used to compute the distance between two shapes.
They are placed automatically when you create a shape, but you can modify their positions by dragging them around.
This matters right now, because reordering the shapes did not put the rim’s exit anywhere sensible. The rim finishes where its row of stitches finishes, at the far corner of the band, and that is not the corner the handle starts at. Hence the jump you are still looking at.
Press Show me how to move the entry and exit points to see how you can drag the red one round to the end nearest the handle. As you do so, the gap between them closes to nothing: the two shapes are now sewn as one continuous run.
Dragging by hand is worth knowing, but it can be a bit tedious. There is a faster way: with a shape selected, open Entry / Exit in the bar across the top of the window and click Auto-optimize. Boldbobbin looks at the shape sewn before and the shape sewn after, and picks the pair of points that makes the travel shortest. The fill itself does not change, only where the thread enters and leaves. On the rim that is the end nearest the handle, which is where you would have dragged it anyway.
Of course, this only works within a run of shapes in the same colour. Since a colour change forces a trim anyway, there is no need to optimize the pathing between two consecutive shapes of different colours. In turn, this means it is generally better to do one colour after another. This is a rule of thumb, not a strict rule, because stitch order is not only a matter of path optimization! Sometimes you need to come back to a previous colour to stitch on top of another.
Placing connecting stitches yourself
You solved the connection between the rim and the handle, but there is one problem left. The gap between the handle and the saucer is too big, at around 9 mm. You cannot simply optimize the entry and exit points to get a nice connecting running stitch.
To solve this issue, you need to draw the travel yourself. Select the individual stitch tool, and place stitches that follow the border of the cup closely. Yes, you are adding a few stitches to your design that are not part of the input image. But a running stitch is often not too noticeable, especially when it is made in a colour close to the fill colour.
Click on Show me how to place the connecting stitches to see how to place them from the end of the handle down and around the edge of the cup to where the saucer starts. The walkthrough then applies the two techniques you have just seen:
- It puts the newly created layer between the handle and the saucer in the layer order. A shape you have just drawn goes on top, which means it would be sewn last.
- It selects the saucer and drags its entry point (the green diamond) next to the last stitch of your connecting stitches. Auto-optimize would have done the same thing.
The needle now walks to the saucer instead of jumping to it, and because the path hugs the edge of the cup body, the walk is hidden against a colour close to its own. As mentioned in the previous part, running stitch can be used as a travel stitch!
Changing the connection type
The dark blue is one continuous run, but sometimes that is impossible and we need to trim the design. The grey steam, for instance, is made of four separate wisps. If you look in stitch mode, the three gaps between them are jumps. They are represented as orange dashed lines, about 5 mm each. If you sew that as it stands, you will get three loose grey strands stretched across the middle of your steam. This would be quite ugly.
You have two options: either cut by hand after the stitch out, or change the connection type from jump to trim. To do so in Boldbobbin, click on one of those orange lines. It will cycle the connection type: trim → jump → running. A single click will therefore turn a jump stitch into a running stitch, so you need to click a second time. When you see a red dashed line with scissors, it means you have successfully turned a jump into a trim. The machine will cut between the wisps and nothing crosses the gap.
Do that to all three. Two clicks each. When you are done, the steam looks like this:
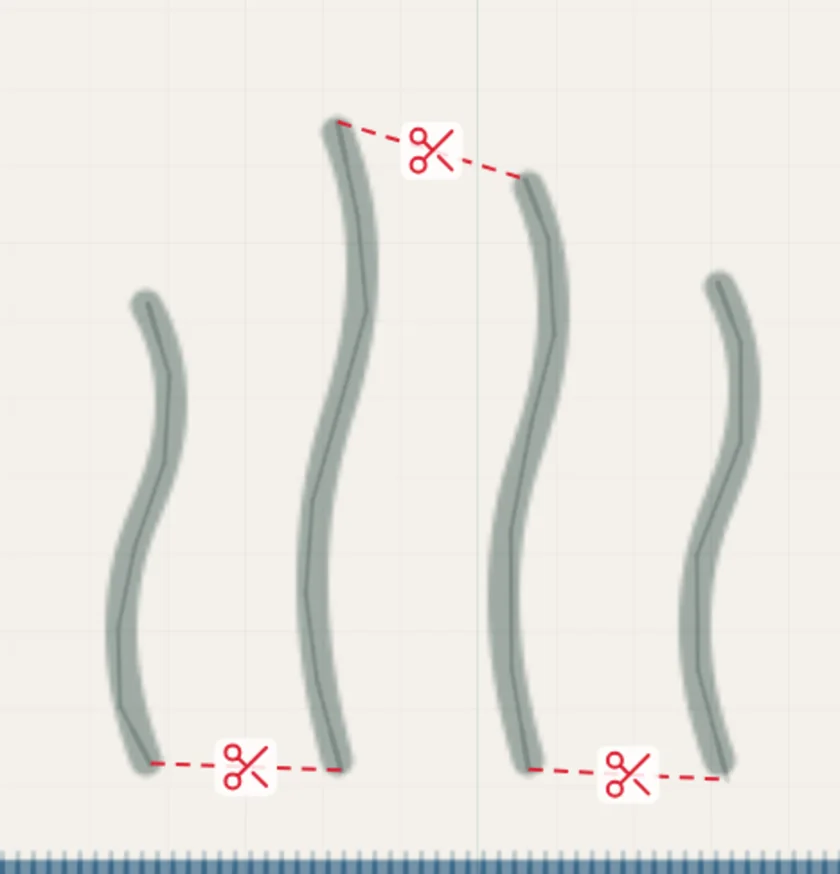
Press Show me the jumps and trims to watch the two clicks happen on each gap. You can also right-click or shift+click a connector instead and pick Connect, Jump or Trim directly.
All of this might sound like a lot, but as you learn the craft, this will become second nature. Let’s get to the fun part now: watching it get stitched!
Watch it sew
First, let’s check on screen how it will sew on the machine. Click Animate in the bottom bar and press play.
Checking the animation before you send it to the machine is a good habit. It helps you spot a problem in the stitch order. Better to figure that out now than when the design is already running on your machine!
Export it and sew it
You already know how to do this from Part 3! Press Export, pick your machine’s format, and put the file on a USB stick.
I embroidered this design onto white felt with a tear-away stabiliser behind it. A few minutes of sewing later, you should end up with something like this!
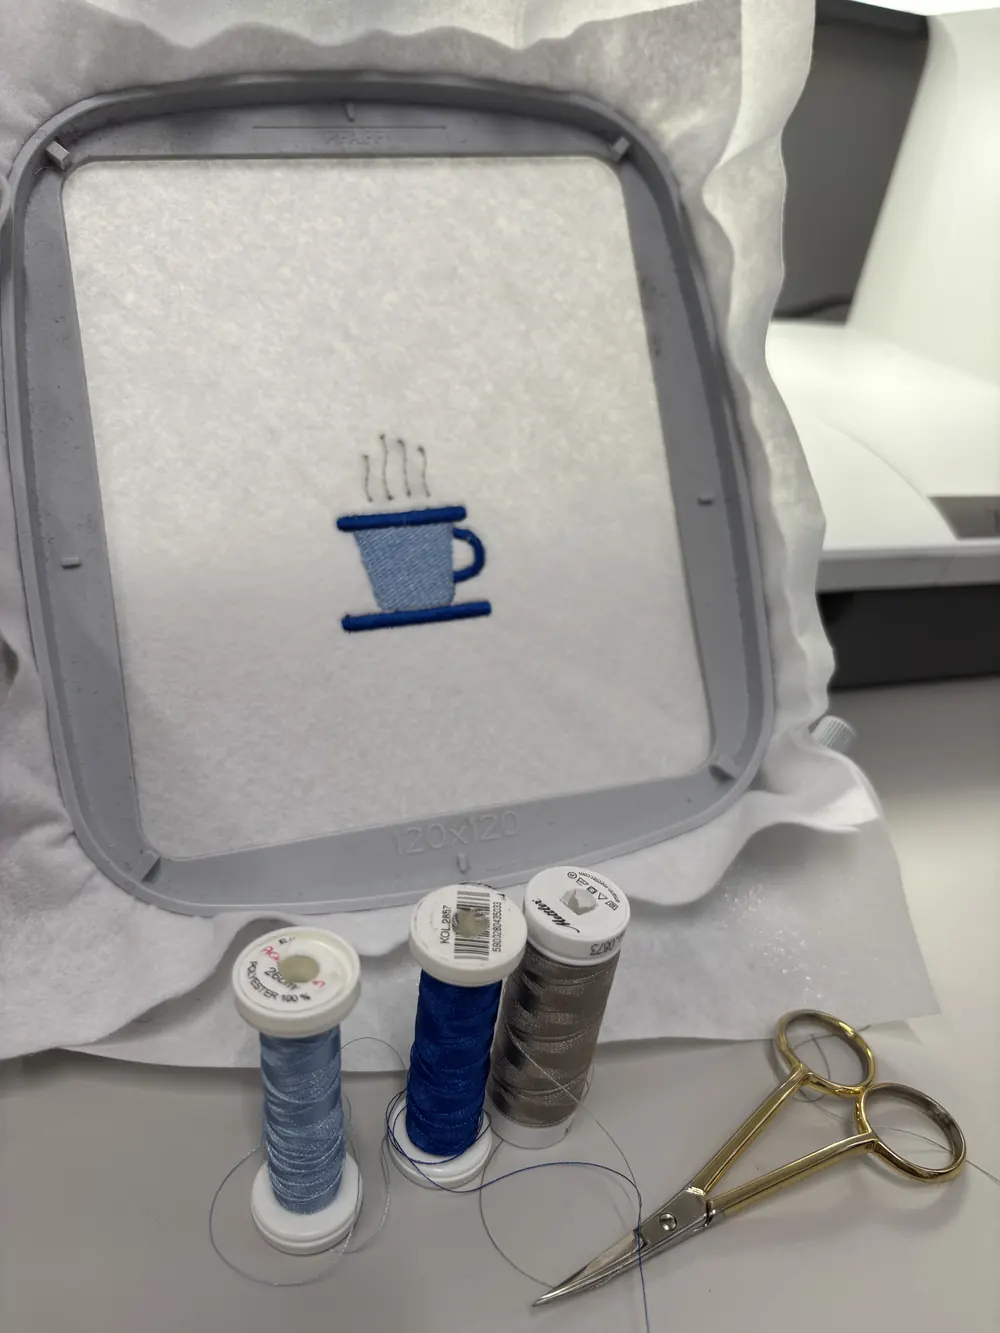
Congratulations, you’re a digitizer!
You can be proud of yourself: you went through a lot! You learned how to trace basic shapes, you learned the basics of stitch types and when to apply which, and you even touched upon path optimization. And you embroidered your first design of your own. Not everyone takes the step to become a digitizer, and you just did.
If you enjoyed this free tutorial, I do have a favour to ask you! If you could share it with your friends and with the world on social media, alongside your creation, it would mean the world to me. Because if it was useful to you, chances are that it will be useful to others. Empowering as many people as possible to be creative and to put a bit more beauty into this sometimes dull world is what gets me out of bed in the morning, so I would be thankful if you could help me spread the word. Many thanks in advance! 🥰
There is a last part on where you can take it from here. Completely optional, but as you know, this tutorial is far from all there is to know in the vast world of embroidery (we haven’t talked about important topics like push/pull compensation or underlay, for instance). To know what you can do now to expand your knowledge, check out the next page!